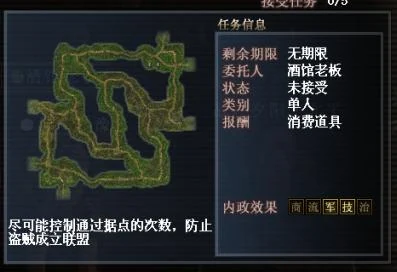
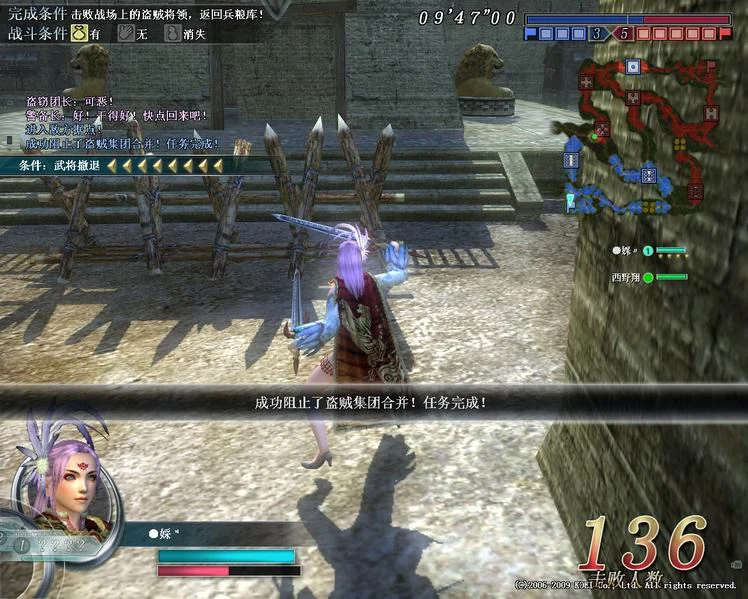
Rewards by Rank
| S rank | A rank | B rank | C rank | D Rank | E Rank |
|---|
| Quest Reward | Dragon Scale x4 Thunder Jade x2 Time Protection Charm Liquid Dye x1 | Talisman Water x4 Dragon Scale x4 | Talisman Water x4 Dragon Scale x2 | Talisman Water x4 | Talisman Water x2 | Talisman Water Military funds 300 |
Walkthrough
This quest isn't difficult, but since the two messengers will move, you must first familiarize yourself with their movement routes. Let me briefly explain their movement patterns below.
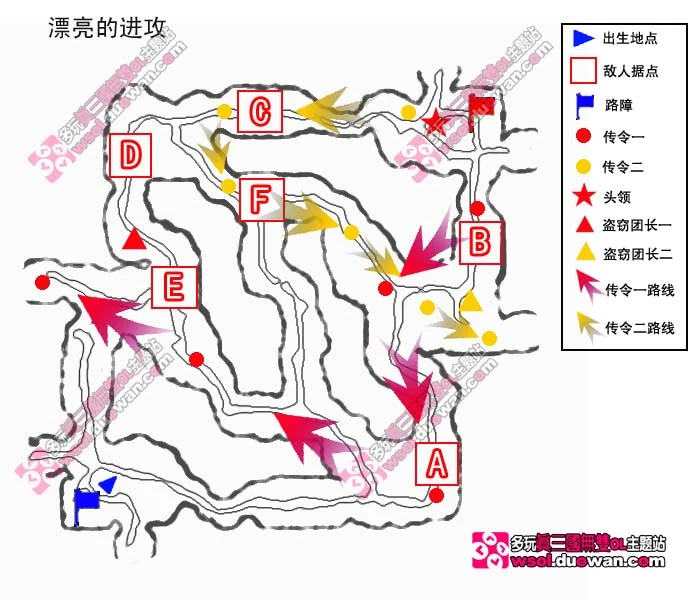
What's called movement is actually teleportation - after a period of time they will refresh at different locations. I have already marked the refresh routes of both messengers on the map. Note that they move once every 30 to 60 seconds and then disappear at the map edges.4 minutes 30 seconds after the quest starts, they will completely disengage.
30 seconds after completely disengaging, the Bandit Leader will refresh at the location shown in the image. Although letting the messengers disengage won't cause quest failure, it's best to defeat them for a good evaluation.
The messengers' advance route is fixed, you can completely wait for them to come to you.
Messenger 1 is closest to the player, so we target Messenger 1. Go up through Base A and walk north for a bit, at this time Messenger 1 will refresh right in front of you, defeat them.
NextImmediatelyMove towards Base C
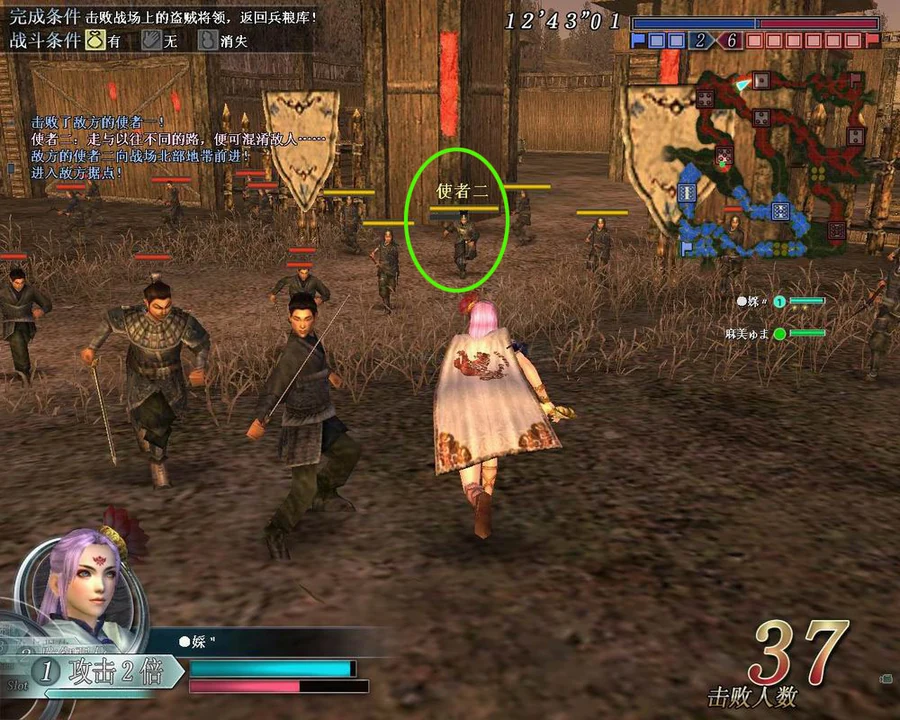
If you are using a high mobility weapon with fast enough opening speed, Messenger 2 should still be located on the left side of Base C. This is the key to this route and can save a lot of time.
If you're not fast enough, Messenger 2 will move to the left side of Base F, making this route meaningless. You can refer to other routes in the notes below.
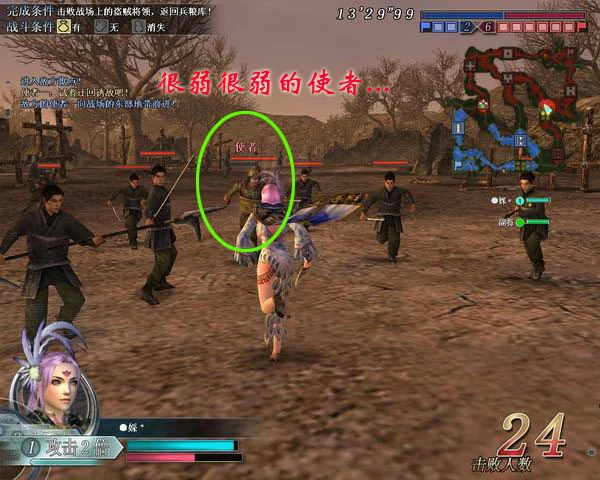
The messengers are not strong, so there's no need to worry about weapon issues.
After the messenger is defeated, firstCapture Base C! The leader spawns near the enemy granary. Rush over and kill them. Although it's a leader, their health, defense, and attack power are pitifully low.
After defeating the leader, the system will prompt you to quickly return to your army's granary. But don't rush back, pass through Base C and Base D to run to the Theft Leader's spawn location.
At this time please quickly spawn troops,Build up a maximum movement before the Theft Leader spawns。
Bandit Leader 1 refreshes 1 minute 20 seconds after the leader dies, defeat him! (PS: Both are so weak that even a single enhanced C2 with a medium attack weapon can completely kill them) Quickly activate maximum movement effect, pass through Base E and head straight to your own granary! Quest complete.
The order of bases passed through isA-F-C-C-D-E
Since Base C was already captured when first passed through, the second pass doesn't count, so exactly 5 bases are passed through!
Bandit Leader 2 refreshes 3 minutes 20 seconds after the leader dies. That is, it refreshes 2 minutes after Bandit Leader 1 dies if you haven't returned to your own granary yet.
Spawn location as shown in the image.
However, unless it's a heavy weapon, or you're doing it intentionally... otherwise in 2 minutes, you could crawl to the provisions... Bandit Leader 2 basically has no refresh chance.
Run back to the granary, quest complete! Achieved S rating!
S-Rank Achievement Notes
The S rank for this quest is super simple. Based on completing the quest steps I mentioned above, just control yourself to pass through bases fewer than 5 times. In that case, you must plan your own movement route.
Besides the route above, you can also do this:
First, pass through Base A, then walk north for a while and eliminate the 2 messengers that spawn there, then pass through Base B and kill the enemy leader that spawns. Next pass through Base C and Base D, wait there for the Theft Leader to appear, then defeat them. Finally pass through Base E and head straight to your own granary. Simply put, the bases passed through are represented asA>B>C>D>E, exactly 5 bases.
Quest completed. S rank obtained
What? You're asking about the other leader? Isn't 2 minutes enough time for you to return to your own granary? As long as you return to your own granary before the refresh, Leader 2 will not spawn.
You might ask again, why not return to the granary directly after killing the leader. I've thought about this too, but even in divine speed state, it's impossible to get from the enemy granary to your own granary within 1 minute 20 seconds.
If you're really not good at traveling, then the route needs to be slightly modified.
Pass through Base A, eliminate 2 messengers. Then enter Base B and capture it. Then kill the leader, rush to Base C and capture it. Go to Base D and capture it as well. Then eliminate the refreshed leader. Turn back, pass through Bases D, C, B that you've captured. Eliminate Bandit Leader 2. Then pass through Base A and return to your army's granary. Simply expressed asA>B>C>D>D>C>B>ASince Bases B, C, D are occupied by yourself, passing through them a second time doesn't count as passing through enemy bases. So it's still a total of 5 times.
Finally, let me add the capture methods for several bases
A Soldier Defeat
B Soldier Defeat
C
Squad Leader Defeated
D Captain Defeat
E
Captain Defeat
F Tower Destruction
Actually always felt this quest was strange, the bosses are all pitifully weak, yet it's still listed as a B rank quest. Look at other B rank quests, they all have super armor bosses.
The fun of this quest lies in how to arrange the most suitable route for yourself to complete the quest most efficiently.
評価別報酬
| Sランク | Aランク | Bランク | Cランク | Dランク | Eランク |
|---|
| Quest Reward | Dragon Scale x4 Thunder Jade x2 Time Protection Charm Liquid Dye x1 | Talisman Water x4 Dragon Scale x4 | Talisman Water x4 Dragon Scale x2 | Talisman Water x4 | Talisman Water x2 | Talisman Water Military funds 300 |
攻略手順
このクエストは難しいものではありませんが、二人の使者が移動するため、まず移動ルートを把握しておく必要があります。以下に彼らの行動パターンを簡単に説明しましょう。
移動と呼ばれるものは、実際にはテレポートです。一定時間が経過すると、別の場所にリフレッシュされます。私はすでに両方のメッセンジャーの更新ルートを地図上にマークしました。 30 ~ 60 秒に 1 回移動し、マップの端で消えます。クエスト開始から 4 分 30 秒後に完全に消滅します。
完全に離脱してから 30 秒後、Bandit Leader は画像に示されている場所に更新されます。使者を解放してもクエスト失敗にはなりませんが、良い評価を得るには倒したほうが良いでしょう。
使者の進行ルートは決まっており、完全に使者が来るのを待つことができます。
メッセンジャー 1 はプレイヤーに最も近いので、メッセンジャー 1 をターゲットにします。拠点 A を通って北に少し歩くと、この時点でメッセンジャー 1 が目の前で更新され、彼らを倒します。
次はすぐに拠点Cに向かって移動します
十分に速い開放速度を持つ高機動兵器を使用している場合、メッセンジャー 2 は依然として基地 C の左側に配置されているはずです。これがこのルートの鍵であり、時間を大幅に節約できます。
スピードが足りない場合、メッセンジャー 2 は拠点 F の左側に移動してしまい、このルートは無意味になってしまいます。以下のメモで他のルートを参照できます。
使者はそれほど強くないので、武器の問題を心配する必要はありません。
使者を倒したら、まずは拠点Cを占領せよ!リーダーは敵の穀倉の近くに出現します。急いで彼らを殺してください。リーダーとはいえ、体力、防御力、攻撃力が哀れなほど低い。
リーダーを倒した後、システムはすぐに軍の穀倉に戻るように促します。ただし、急いで戻らないで、拠点 C と拠点 D を通過して、盗難リーダーの出現場所まで走ります。
このとき、速やかに軍隊をスポーンし、盗難リーダーがスポーンする前に最大の動きを構築してください。
山賊のリーダー 1 は、リーダーが死亡してから 1 分 20 秒後に更新され、リーダーを倒します。 (追記:どちらも非常に弱いので、中攻撃武器を備えた強化C2単体でも完全に倒せます) 最大移動効果を素早く発動し、拠点Eを通過して自分の穀物倉庫へ直行しましょう!クエスト完了。
通過する塩基の順序はA-F-C-C-D-Eです
最初に通過したときにベース C がすでに占領されているため、2 回目のパスはカウントされず、ちょうど 5 つのベースが通過されます。
Bandit Leader 2 は、リーダーが死亡してから 3 分 20 秒後に更新されます。つまり、自分の穀物倉庫にまだ戻っていない場合は、Bandit Leader 1 が死亡してから 2 分後に更新されます。
画像に示すようにスポーン位置。
ただし、それが重武器であるか、意図的にそれを行っている場合を除き、...そうでない場合は、2分以内に食料品まで這うことができます... Bandit Leader 2には基本的にリフレッシュチャンスがありません。
穀倉に戻ってクエスト完了! S評価達成!
Sランク達成ノート
このクエストのSランクは超簡単です。上で述べたクエストの手順を完了することに基づいて、拠点を通過する回数が 5 回未満になるように自分を制御してください。その場合は、自分で移動ルートを計画する必要があります。
上記のルートの他に、次のこともできます。
まず拠点Aを通過し、北にしばらく歩いてそこにスポーンする使者2人を排除し、その後拠点Bを通過してスポーンする敵のリーダーを倒します。次に拠点 C と拠点 D を通過し、そこで盗難リーダーが現れるのを待ってから、彼らを倒します。最後にBase Eを通過し、自分の穀倉地帯に直行します。簡単に言うと、通過する塩基はA>B>C>D>Eとなり、ちょうど5塩基になります。
クエスト完了。 Sランク獲得
何?もう一人のリーダーについて聞いているのですか?自分の穀倉に戻るのに2分もあれば十分ではないでしょうか?更新前に自分の穀倉に戻っている限り、リーダー 2 は出現しません。
リーダーを殺した後、なぜ直接穀倉に戻らないのか、とまた疑問に思うかもしれません。これも考えたんですが、神速状態でも敵の穀倉から自軍の穀倉まで1分20秒以内に到達するのは不可能です。
旅行が本当に苦手な場合は、ルートを少し変更する必要があります。
拠点Aを通過し、使者2名を排除する。次に拠点Bに入り、占領します。次にリーダーを殺し、拠点 C に急行して占領します。拠点Dに行き、同様に占領します。その後、リフレッシュされたリーダーを排除します。引き返して、占領した拠点 D、C、B を通過します。 Bandit Leader 2 を排除します。その後、基地 A を通過して軍の穀倉に戻ります。単純に表すとA>B>C>D>D>C>B>A 拠点B、C、Dは自軍が占領しているため、2回目の通過は敵拠点通過とみなされません。ということで、まだ合計5回です。
最後にいくつかの拠点の攻略方法を追記しておきます。
兵士の敗北
B 兵士の敗北
C
分隊長の敗北
Dキャプテンの敗北
E
キャプテンの敗北
Fタワー破壊
実はこのクエストは前々から不思議だと思っていて、ボスが情けないほど弱いのに未だにBランククエストに登録されているんです。他のBランククエストを見ると、すべてスーパーアーマーのボスがいます。
自分に合ったルートをどう組み立て、効率よくクエストをクリアしていくかがこのクエストの楽しみです。
各评级奖励
| S级 | A级 | B级 | C级 | D级 | E级 |
|---|
| Quest Reward | Dragon Scale x4 Thunder Jade x2 Time Protection Charm Liquid Dye x1 | Talisman Water x4 Dragon Scale x4 | Talisman Water x4 Dragon Scale x2 | Talisman Water x4 | Talisman Water x2 | Talisman Water Military funds 300 |
攻略流程
这个任务并不难,但是由于两个信使会移动,所以你必须先熟悉他们的移动路线。下面我就简单解释一下他们的动作模式。
所谓移动,其实就是瞬移——一段时间后它们会在不同的位置刷新。我已经在地图上标记了两个信使的刷新路线。请注意,他们每30到60秒移动一次,然后消失在地图边缘。任务开始后4分30秒,他们将完全脱离。
完全脱离后30秒,强盗首领会在图中所示位置刷新。虽然让使者脱离并不会导致任务失败,但最好还是打败他们才能获得良好的评价。
使者的前进路线是固定的,你完全可以等待他们来找你。
信使1距离玩家最近,所以我们以信使1为目标。通过基地A往上走,向北走一段路,此时信使1会在你面前刷新,击败他们。
接下来立即向C基地移动
如果你使用的是高机动武器且开启速度足够快的话,信使2应该还是位于C基地的左侧。这是这条路线的关键,可以节省很多时间。
如果你的速度不够快,信使 2 号将会移动到 F 基地的左侧,使这条路线变得毫无意义。其他路线可以参考下面的注释。
使者实力不强,不用担心武器问题。
击败信使后,先攻占C基地!首领在敌人粮仓附近生成。冲过去杀了他们。虽然是领袖,但生命值、防御力、攻击力却低得可怜。
击败首领后,系统会提示你快速返回部队粮仓。但不要急着回去,穿过基地 C 和基地 D 跑到盗窃首领的重生位置。
此时请快速生成部队,在盗窃首领生成之前建立最大移动力。
强盗首领1在首领死亡后1分20秒刷新,击败他! (PS:两者都太弱了,单用强化C2搭配中攻击武器就可以彻底杀死他们)快速激活最大移动效果,穿过E基地,直奔自己的粮仓!任务完成。
碱基通过的顺序是A-F-C-C-D-E
由于C基地在第一次通过时已经被占领,所以第二次不算,所以正好通过了5个基地!
强盗首领2在首领死亡后3分20秒刷新。也就是说,如果你还没有回到自己的粮仓,盗贼首领1死后2分钟就会刷新。
生成位置如图所示。
不过,除非是重武器,或者你是故意的……否则2分钟之内,你就可以爬到补给处了……强盗首领2基本没有刷新机会。
跑回粮仓,任务完成!获得S级评价!
S级成就笔记
这个任务的S等级非常简单。在完成我上面提到的任务步骤的基础上,控制自己穿过基地的次数少于5次即可。在这种情况下,您必须规划自己的移动路线。
除了上面的路线,你还可以这样做:
首先,穿过基地A,然后向北走一段时间,消灭那里生成的2个信使,然后穿过基地B,杀死生成的敌方首领。接下来穿过基地C和基地D,在那里等待盗窃头目出现,然后击败他们。最后穿过E基地,直奔自己的粮仓。简单来说,通过的碱基表示为A>B>C>D>E,正好是5个碱基。
任务完成。获得S等级
什么?你问的是另一位领导吗? 2分钟的时间还不够你回自己的粮仓吗?只要刷新前回到自己的粮仓,领袖2就不会生成。
你可能又会问,杀掉首领后为什么不直接返回粮仓呢?我也想过这个问题,但是即使是神速状态,也不可能在1分20秒内从敌方粮仓到达己方粮仓。
如果你实在不擅长旅行,那么路线就需要稍微修改一下。
通过基地A,消灭2名信使。然后进入B基地并占领它。然后杀掉首领,冲向C基地,将其捕获。前往D基地并占领它。然后消灭刷新的领导者。回头,穿过你占领的D、C、B基地。消灭土匪头子2。然后穿过A基地,回到自己军队的粮仓。简单表示为A>B>C>D>D>C>B>A由于B、C、D基地已被自己占领,第二次穿过这些基地不算穿过敌方基地。所以一共还是5次。
最后补充一下几个基地的捕获方法
士兵的失败
B 士兵失败
C
班长被击败
D队长失败
乙
队长失败
F塔破坏
其实总觉得这个任务很奇怪,boss都弱得可怜,居然还被列为B级任务。看看其他B级任务,都有超级护甲boss。
这个任务的乐趣就在于如何安排最适合自己的路线,最高效的完成任务。
各評級獎勵
| S級 | A級 | B級 | C級 | D級 | E級 |
|---|
| Quest Reward | Dragon Scale x4 Thunder Jade x2 Time Protection Charm Liquid Dye x1 | Talisman Water x4 Dragon Scale x4 | Talisman Water x4 Dragon Scale x2 | Talisman Water x4 | Talisman Water x2 | Talisman Water Military funds 300 |
攻略流程
這個任務並不難,但是由於兩個信使會移動,所以你必須先熟悉他們的移動路線。下面我就簡單解釋一下他們的動作模式。
所謂移動,其實就是瞬移──一段時間後它們會在不同的位置刷新。我已經在地圖上標記了兩個信使的刷新路線。請注意,他們每30到60秒移動一次,然後消失在地圖邊緣。任務開始後4分30秒,他們將完全脫離。
完全脫離後30秒,強盜首領會在圖中所示位置刷新。雖然讓使者脫離並不會導致任務失敗,但最好還是打敗他們才能獲得良好的評價。
使者的前進路線是固定的,你完全可以等待他們來找你。
信使1距離玩家最近,所以我們以信使1為目標。透過基地A往上走,向北走一段路,此時信差1會在你面前刷新,擊敗他們。
接下來立即向C基地移動
如果你使用的是高機動武器且開啟速度夠快的話,信差2應該還是位於C基地的左側。這是這條路線的關鍵,可以節省很多時間。
如果你的速度不夠快,信差 2 號將會移動到 F 基地的左側,讓這條路線變得毫無意義。其他路線可以參考下面的註解。
使者實力不強,不用擔心武器問題。
擊敗信差後,先攻佔C基地!首領在敵人糧倉附近生成。衝過去殺了他們。雖然是領袖,但生命值、防禦力、攻擊力卻低得可憐。
擊敗首領後,系統會提示你快速返回部隊糧倉。但不要急著回去,穿過基地 C 和基地 D 跑到偷竊首領的重生位置。
此時請快速生成部隊,在盜竊首領生成之前建立最大移動力。
強盜首領1在首領死亡後1分20秒刷新,打敗他! (PS:兩者都太弱了,單用強化C2搭配中攻擊武器就可以徹底殺死他們)快速激活最大移動效果,穿過E基地,直奔自己的糧倉!任務完成。
鹼基通過的順序是A-F-C-C-D-E
由於C基地在第一次通過時已經被佔領,所以第二次不算,所以剛好通過了5個基地!
強盜首領2在首領死亡後3分20秒刷新。也就是說,如果你還沒回到自己的糧倉,盜賊首領1死後2分鐘就會刷新。
生成位置如圖所示。
不過,除非是重武器,或是你是故意的……否則2分鐘之內,你就可以爬到補給處了……強盜首領2基本上沒有刷新機會。
跑回糧倉,任務完成!獲得S級評價!
S級成就筆記
這個任務的S等級非常簡單。在完成我上面提到的任務步驟的基礎上,控制自己穿過基地的次數少於5次即可。在這種情況下,您必須規劃自己的移動路線。
除了上面的路線,你還可以這樣做:
首先,穿過基地A,然後向北走一段時間,消滅那裡生成的2個信使,然後穿過基地B,殺死生成的敵方首領。接下來穿過基地C和基地D,在那裡等待盜竊頭目出現,然後擊敗他們。最後穿過E基地,直奔自己的糧倉。簡單來說,通過的鹼基表示為A>B>C>D>E,剛好是5個鹼基。
任務完成。獲得S等級
什麼?你問的是另一位領導者嗎? 2分鐘的時間還不夠你回自己的糧倉嗎?只要刷新前回到自己的糧倉,領袖2就不會生成。
你可能又會問,殺首領後為什麼不直接回糧倉呢?我也想過這個問題,但即使是神速狀態,也不可能在1分20秒內從敵方糧倉到達己方糧倉。
如果你實在不擅長旅行,那麼路線就需要稍微修改一下。
透過基地A,消滅2名信差。然後進入B基地並佔領它。然後殺掉首領,衝向C基地,將其捕獲。前往D基地並佔領它。然後消滅刷新的領導者。回頭,穿過你佔領的D、C、B基地。消滅土匪頭子2。然後穿過A基地,回到自己軍隊的糧倉。簡單表示為A>B>C>D>D>C>B>A由於B、C、D基地已被自己佔領,第二次穿過這些基地不算穿過敵方基地。所以總共還是5次。
最後補充幾個基地的捕獲方法
士兵的失敗
B 士兵失敗
C
班長被擊敗
D隊長失敗
乙
隊長失敗
F塔破壞
其實總覺得這個任務很奇怪,頭目都弱得可憐,居然還被列為B級任務。看看其他B級任務,都有超級護甲頭目。
這個任務的樂趣就在於如何安排最適合自己的路線,最有效率的完成任務。
المكافآت حسب الرتبة
| رتبة S | رتبة | رتبة ب | رتبة ج | الرتبة د | الرتبة E |
|---|
| Quest Reward | Dragon Scale x4 Thunder Jade x2 Time Protection Charm Liquid Dye x1 | Talisman Water x4 Dragon Scale x4 | Talisman Water x4 Dragon Scale x2 | Talisman Water x4 | Talisman Water x2 | Talisman Water Military funds 300 |
دليل الحل
هذه المهمة ليست صعبة، ولكن بما أن الرسولين سيتحركان، فيجب عليك أولاً أن تتعرف على طرق حركتهما. اسمحوا لي أن أشرح بإيجاز أنماط حركتهم أدناه.
ما يسمى بالحركة هو في الواقع النقل الآني - بعد فترة من الوقت سيتم تحديثها في مواقع مختلفة. لقد قمت بالفعل بوضع علامة على مسارات التحديث لكلا الرسولين على الخريطة. لاحظ أنهم يتحركون مرة واحدة كل 30 إلى 60 ثانية ثم يختفون عند حواف الخريطة. بعد 4 دقائق و30 ثانية من بدء المهمة، سينفصلون تمامًا.
بعد 30 ثانية من فك الارتباط تمامًا، سيتم تحديث Bandit Leader في الموقع الموضح في الصورة. على الرغم من أن السماح للرسل بفك الارتباط لن يتسبب في فشل المهمة، فمن الأفضل هزيمتهم للحصول على تقييم جيد.
تم إصلاح طريق تقدم الرسل، ويمكنك انتظار وصولهم إليك تمامًا.
Messenger 1 هو الأقرب إلى اللاعب، لذلك نستهدف Messenger 1. اصعد عبر القاعدة A وامش شمالًا قليلاً، في هذا الوقت سيتم تحديث Messenger 1 أمامك مباشرةً، واهزمهم.
التالي: تحرك فورًا نحو القاعدة C
إذا كنت تستخدم سلاحًا عالي الحركة وسرعة فتح كافية، فيجب أن يظل Messenger 2 موجودًا على الجانب الأيسر من القاعدة C. وهذا هو مفتاح هذا الطريق ويمكن أن يوفر الكثير من الوقت.
إذا لم تكن بالسرعة الكافية، فسينتقل Messenger 2 إلى الجانب الأيسر من القاعدة F، مما يجعل هذا الطريق بلا معنى. يمكنك الرجوع إلى طرق أخرى في الملاحظات أدناه.
الرسل ليسوا أقوياء، لذا لا داعي للقلق بشأن مشكلات الأسلحة.
بعد هزيمة الرسول، قم أولاً بالتقاط Base C! يظهر القائد بالقرب من مخزن حبوب العدو. التسرع وقتلهم. على الرغم من كونه قائدًا، إلا أن صحته ودفاعه وقوته الهجومية منخفضة للغاية.
بعد هزيمة القائد، سيطالبك النظام بالعودة بسرعة إلى مخزن الحبوب الخاص بجيشك. لكن لا تتعجل بالعودة، قم بالمرور عبر القاعدة C والقاعدة D للركض إلى موقع ظهور Theft Leader.
في هذا الوقت، يرجى نشر القوات بسرعة، قم ببناء أقصى قدر من الحركة قبل ظهور زعيم السرقة.
يتم تحديث Bandit Leader 1 بعد دقيقة و20 ثانية من وفاة القائد، اهزمه! (ملاحظة: كلاهما ضعيف جدًا بحيث يمكن لسلاح C2 محسّن واحد بسلاح هجوم متوسط أن يقتلهما تمامًا) قم بتنشيط أقصى تأثير للحركة بسرعة، ومر عبر القاعدة E واتجه مباشرة إلى مخزن الحبوب الخاص بك! اكتملت المهمة.
ترتيب القواعد التي تم تمريرها هوA-F-C-C-D-E
نظرًا لأن القاعدة C قد تم التقاطها بالفعل عند المرور لأول مرة، فإن التمريرة الثانية لا يتم احتسابها، لذلك يتم تمرير 5 قواعد بالضبط!
يتم تحديث Bandit Leader 2 بعد 3 دقائق و20 ثانية من وفاة القائد. أي أنه يتم تحديثه بعد دقيقتين من وفاة Bandit Leader 1 إذا لم تكن قد عدت إلى مخزن الحبوب الخاص بك بعد.
مكان التكاثر كما هو موضح في الصورة.
ومع ذلك، ما لم يكن سلاحًا ثقيلًا، أو إذا كنت تفعل ذلك عمدًا... وإلا ففي دقيقتين، يمكنك الزحف إلى المؤن... ليس لدى Bandit Leader 2 أي فرصة للتحديث.
ارجع إلى مخزن الحبوب، اكتملت المهمة! حصلت على تصنيف S!
ملاحظات إنجاز الرتبة S
الرتبة S لهذه المهمة بسيطة للغاية. بناءً على إكمال خطوات المهمة التي ذكرتها أعلاه، ما عليك سوى التحكم في نفسك للمرور عبر القواعد أقل من 5 مرات. في هذه الحالة، يجب عليك التخطيط لمسار حركتك الخاصة.
إلى جانب المسار أعلاه، يمكنك أيضًا القيام بذلك:
أولاً، قم بالمرور عبر القاعدة A، ثم قم بالسير شمالًا لفترة من الوقت وقم بالقضاء على الرسولين اللذين يظهران هناك، ثم مر عبر القاعدة B واقتل زعيم العدو الذي يظهر. قم بالمرور بعد ذلك عبر القاعدة C والقاعدة D، وانتظر هناك حتى يظهر زعيم السرقة، ثم اهزمهم. أخيرًا، قم بالمرور عبر القاعدة E وتوجه مباشرة إلى مخزن الحبوب الخاص بك. ببساطة، يتم تمثيل القواعد التي تم تمريرها بالشكل A>B>C>D>E، أي 5 قواعد بالضبط.
اكتملت المهمة. تم الحصول على رتبة S
ماذا؟ هل تسألين عن القائد الآخر؟ أليست دقيقتين كافية للعودة إلى مخزن الحبوب الخاص بك؟ طالما عدت إلى مخزن الحبوب الخاص بك قبل التحديث، فلن يظهر القائد 2.
قد تسأل مرة أخرى، لماذا لا تعود إلى مخزن الحبوب مباشرة بعد قتل القائد. لقد فكرت في هذا أيضًا، ولكن حتى في حالة السرعة الإلهية، من المستحيل الانتقال من مخزن الحبوب الخاص بالعدو إلى مخزن الحبوب الخاص بك خلال دقيقة واحدة و20 ثانية.
إذا كنت لا تجيد السفر حقًا، فيجب تعديل المسار قليلاً.
قم بالمرور عبر القاعدة A، وقم بالقضاء على 2 من الرسل. ثم أدخل القاعدة B وقم بالتقاطها. ثم اقتل القائد، واندفع إلى القاعدة C وقم بالقبض عليه. انتقل إلى Base D وقم بالتقاطها أيضًا. ثم القضاء على الزعيم المنعش. عد إلى الوراء، ومر عبر القواعد D، C، B التي استولت عليها. قم بالقضاء على Bandit Leader 2. ثم مر عبر القاعدة A وعُد إلى مخزن حبوب جيشك. يتم التعبير عنها ببساطة كـ A>B>C>D>D>C>B>Aنظرًا لأن القواعد B وC وD تشغلها بنفسك، فإن المرور عبرها مرة ثانية لا يعد بمثابة مرور عبر قواعد العدو. لذلك لا يزال إجمالي 5 مرات.
وأخيرا، اسمحوا لي أن أضيف طرق الالتقاط لعدة قواعد
هزيمة جندي
ب- هزيمة الجندي
ج
هزم قائد الفرقة
د- هزيمة الكابتن
ه
هزيمة الكابتن
تدمير برج F
في الواقع شعرت دائمًا أن هذه المهمة كانت غريبة، فالزعماء جميعهم ضعفاء بشكل مثير للشفقة، ومع ذلك فهي لا تزال مدرجة على أنها مهمة من الرتبة B. انظر إلى المهام الأخرى ذات الرتبة B، فجميعهم لديهم زعماء مدرعون خارقون.
تكمن متعة هذه المهمة في كيفية ترتيب الطريق الأنسب لنفسك لإكمال المهمة بكفاءة أكبر.
รางวัลตามระดับ
| อันดับ S | อันดับ | อันดับบี | อันดับซี | อันดับ D | อันดับ E |
|---|
| Quest Reward | Dragon Scale x4 Thunder Jade x2 Time Protection Charm Liquid Dye x1 | Talisman Water x4 Dragon Scale x4 | Talisman Water x4 Dragon Scale x2 | Talisman Water x4 | Talisman Water x2 | Talisman Water Military funds 300 |
วิธีเล่นผ่าน
ภารกิจนี้ไม่ใช่เรื่องยาก แต่เนื่องจากผู้ส่งสารทั้งสองจะเคลื่อนไหว คุณต้องทำความคุ้นเคยกับเส้นทางการเคลื่อนที่ของพวกเขาก่อน ผมขออธิบายรูปแบบการเคลื่อนไหวของพวกเขาสั้นๆ ด้านล่างนี้
สิ่งที่เรียกว่าการเคลื่อนไหวจริงๆ แล้วคือการเทเลพอร์ต - หลังจากผ่านไประยะหนึ่ง การเคลื่อนไหวจะรีเฟรชที่ตำแหน่งต่างๆ ฉันได้ทำเครื่องหมายเส้นทางการรีเฟรชของผู้ส่งสารทั้งสองบนแผนที่แล้ว โปรดทราบว่าพวกมันจะเคลื่อนที่ทุกๆ 30 ถึง 60 วินาทีแล้วหายไปที่ขอบแผนที่ 4 นาที 30 วินาทีหลังจากภารกิจเริ่มต้น พวกมันจะแยกตัวออกโดยสมบูรณ์
หลังจากปลดประจำการแล้ว 30 วินาที หัวหน้าโจรจะรีเฟรชตำแหน่งที่แสดงในภาพ แม้ว่าการปล่อยให้ผู้ส่งสารแยกจากกันจะไม่ทำให้ภารกิจล้มเหลว แต่เป็นการดีที่สุดที่จะเอาชนะพวกเขาเพื่อการประเมินที่ดี
เส้นทางล่วงหน้าของผู้ส่งสารได้รับการแก้ไขแล้ว คุณสามารถรอให้พวกเขามาหาคุณได้เลย
Messenger 1 อยู่ใกล้ผู้เล่นมากที่สุด ดังนั้นเราจึงกำหนดเป้าหมาย Messenger 1 ขึ้นไปบนฐาน A แล้วเดินไปทางเหนือสักพัก ในเวลานี้ Messenger 1 จะรีเฟรชตรงหน้าคุณ และเอาชนะพวกมัน
ต่อไปมุ่งหน้าสู่ฐาน C ทันที
หากคุณใช้อาวุธที่มีความคล่องตัวสูงและมีความเร็วในการเปิดเร็วพอ Messenger 2 ก็ควรจะตั้งอยู่ทางด้านซ้ายของฐาน C นี่คือกุญแจสำคัญในเส้นทางนี้และประหยัดเวลาได้มาก
หากคุณไม่เร็วพอ Messenger 2 จะเคลื่อนไปทางด้านซ้ายของฐาน F ทำให้เส้นทางนี้ไม่มีความหมาย คุณสามารถดูเส้นทางอื่นได้ในหมายเหตุด้านล่าง
ผู้ส่งสารไม่แข็งแกร่ง ดังนั้นจึงไม่จำเป็นต้องกังวลเกี่ยวกับปัญหาอาวุธ
หลังจากที่ผู้ส่งสารพ่ายแพ้ ให้ยึดฐาน C ก่อน! ผู้นำจะวางไข่ใกล้กับยุ้งฉางของศัตรู รีบไปฆ่าพวกมันซะ แม้ว่าจะเป็นผู้นำ แต่พลังชีวิต การป้องกัน และพลังโจมตีของพวกเขายังต่ำอย่างน่าสมเพช
หลังจากเอาชนะผู้นำได้แล้ว ระบบจะแจ้งให้คุณกลับไปที่ยุ้งฉางกองทัพของคุณอย่างรวดเร็ว แต่อย่าเพิ่งรีบกลับ ผ่านฐาน C และฐาน D เพื่อวิ่งไปยังตำแหน่งวางไข่ของหัวหน้าโจร
ในเวลานี้ โปรดวางไข่กองกำลังอย่างรวดเร็ว สร้างการเคลื่อนไหวสูงสุดก่อนที่ Theft Leader จะวางไข่
Bandit Leader 1 จะรีเฟรช 1 นาที 20 วินาที หลังจากผู้นำตาย เอาชนะเขาซะ! (PS: ทั้งคู่อ่อนแอมากแม้แต่ C2 ที่ปรับปรุงแล้วเพียงตัวเดียวด้วยอาวุธโจมตีขนาดกลางก็สามารถฆ่าพวกมันได้อย่างสมบูรณ์) เปิดใช้งานเอฟเฟกต์การเคลื่อนไหวสูงสุดอย่างรวดเร็ว ผ่านฐาน E แล้วมุ่งหน้าตรงไปยังยุ้งฉางของคุณเอง! ภารกิจเสร็จสมบูรณ์
ลำดับฐานที่ผ่านคือ A-F-C-C-D-E
เนื่องจากฐาน C ถูกจับไปแล้วเมื่อส่งผ่านครั้งแรก การผ่านครั้งที่สองจะไม่นับ ดังนั้น 5 ฐานจึงจะถูกส่งผ่านอย่างแน่นอน!
Bandit Leader 2 จะรีเฟรช 3 นาที 20 วินาที หลังจากที่ผู้นำตาย นั่นคือ มันจะรีเฟรช 2 นาทีหลังจากที่หัวหน้าโจร 1 ตาย หากคุณยังไม่ได้กลับไปยังยุ้งฉางของคุณเอง
ตำแหน่งวางไข่ตามภาพ
อย่างไรก็ตาม เว้นแต่ว่ามันจะเป็นอาวุธหนัก หรือคุณกำลังทำมันโดยเจตนา... ไม่เช่นนั้นภายใน 2 นาที คุณสามารถคลานไปยังเสบียงได้... โดยพื้นฐานแล้ว Bandit Leader 2 จะไม่มีโอกาสรีเฟรชเลย
วิ่งกลับไปที่ยุ้งฉาง ภารกิจเสร็จสิ้น! ได้รับคะแนน S!
บันทึกความสำเร็จระดับ S
ระดับ S สำหรับภารกิจนี้ง่ายมาก จากการทำภารกิจตามขั้นตอนที่กล่าวมาข้างต้น ให้ควบคุมตัวเองให้ผ่านฐานต่างๆ น้อยกว่า 5 ครั้ง ในกรณีนั้นท่านจะต้องวางแผนเส้นทางการเคลื่อนที่ของท่านเอง
นอกจากเส้นทางด้านบนแล้ว คุณยังสามารถทำสิ่งนี้ได้:
ขั้นแรก ผ่านฐาน A จากนั้นเดินไปทางเหนือสักพักและกำจัดผู้ส่งสาร 2 คนที่เกิดที่นั่น จากนั้นผ่านฐาน B และสังหารผู้นำศัตรูที่วางไข่ จากนั้นให้ผ่านฐาน C และฐาน D รอที่นั่นเพื่อให้ Theft Leader ปรากฏตัว จากนั้นเอาชนะพวกมัน ในที่สุดก็ผ่านฐาน E แล้วมุ่งหน้าตรงไปยังยุ้งฉางของคุณเอง พูดง่ายๆ ก็คือ ฐานที่ทะลุผ่านจะแสดงเป็น A>B>C>D>E เท่ากับ 5 ฐานพอดี
ภารกิจเสร็จสิ้น ได้รับอันดับ S
อะไร คุณกำลังถามถึงผู้นำคนอื่นเหรอ? เวลา 2 นาทีไม่พอสำหรับคุณที่จะกลับไปยังยุ้งฉางของคุณเองหรือ? ตราบใดที่คุณกลับไปยังยุ้งฉางของคุณเองก่อนที่จะรีเฟรช ผู้นำ 2 จะไม่เกิด
คุณอาจถามอีกครั้งว่าทำไมไม่กลับไปที่ยุ้งฉางโดยตรงหลังจากสังหารผู้นำแล้ว ฉันก็คิดเรื่องนี้เหมือนกัน แต่ถึงแม้จะอยู่ในสถานะความเร็วศักดิ์สิทธิ์ มันก็เป็นไปไม่ได้ที่จะได้รับจากยุ้งฉางของศัตรูไปยังยุ้งฉางของคุณเองภายใน 1 นาที 20 วินาที
หากเดินทางไม่เก่งจริงๆก็ควรปรับเปลี่ยนเส้นทางเล็กน้อย
ผ่านฐาน A กำจัดผู้ส่งสาร 2 คน จากนั้นเข้าสู่ฐาน B และยึดมัน จากนั้นสังหารผู้นำแล้วรีบไปที่ฐาน C แล้วจับมัน ไปที่ฐาน D แล้วจับมันเช่นกัน จากนั้นกำจัดผู้นำที่สดชื่น หันหลังกลับ ผ่านฐาน D, C, B ที่คุณยึดไว้ กำจัดหัวหน้าโจร 2 จากนั้นผ่านฐาน A และกลับไปยังยุ้งฉางของกองทัพของคุณ แสดงง่ายๆ ว่า A>B>C>D>D>C>B>Aเนื่องจากฐาน B, C, D ถูกครอบครองโดยตัวคุณเอง การผ่านพวกมันเป็นครั้งที่สองจะไม่นับว่าเป็นการผ่านฐานศัตรู ก็ยังรวมเป็น 5 ครั้ง
สุดท้ายนี้ ให้ฉันเพิ่มวิธีการจับภาพสำหรับหลายๆ ฐาน
ความพ่ายแพ้ของทหาร
ความพ่ายแพ้ของทหาร B
ค
หัวหน้าหน่วยพ่ายแพ้
D กัปตันพ่ายแพ้
อี
กัปตันพ่ายแพ้
การทำลายหอคอย F
ที่จริงแล้วมักจะรู้สึกเสมอว่าภารกิจนี้แปลก บอสล้วนอ่อนแออย่างน่าสมเพช แต่ก็ยังถูกระบุว่าเป็นภารกิจระดับ B ดูภารกิจระดับ B อื่นๆ สิ พวกมันล้วนมีบอสเกราะพิเศษ
ความสนุกของภารกิจนี้อยู่ที่การจัดเส้นทางที่เหมาะสมที่สุดสำหรับตัวคุณเองเพื่อทำภารกิจให้สำเร็จอย่างมีประสิทธิภาพสูงสุด